Okay, so you have a blog or are thinking about starting a food blog but you are lost when it comes to taking the photos?
Well you have come to the right place.
2 1/2 years ago, I knew just about nothing. Even now, I don’t know all the tricky photo lingo or photoshop stuff or anything. But I have taught myself (successfully might I boast) how to take good cupcake photos.
My camera is a Cannon T3i (which is basically the same as a T2i) and I use a 50 mm lens (which is about $100.) But if you have an iphone, you can get away with that for a while. The only problem is that is distorts the image a bit, so small things like cupcake look a tad stretched.
Today we are talking about about “Setting the Scene.”
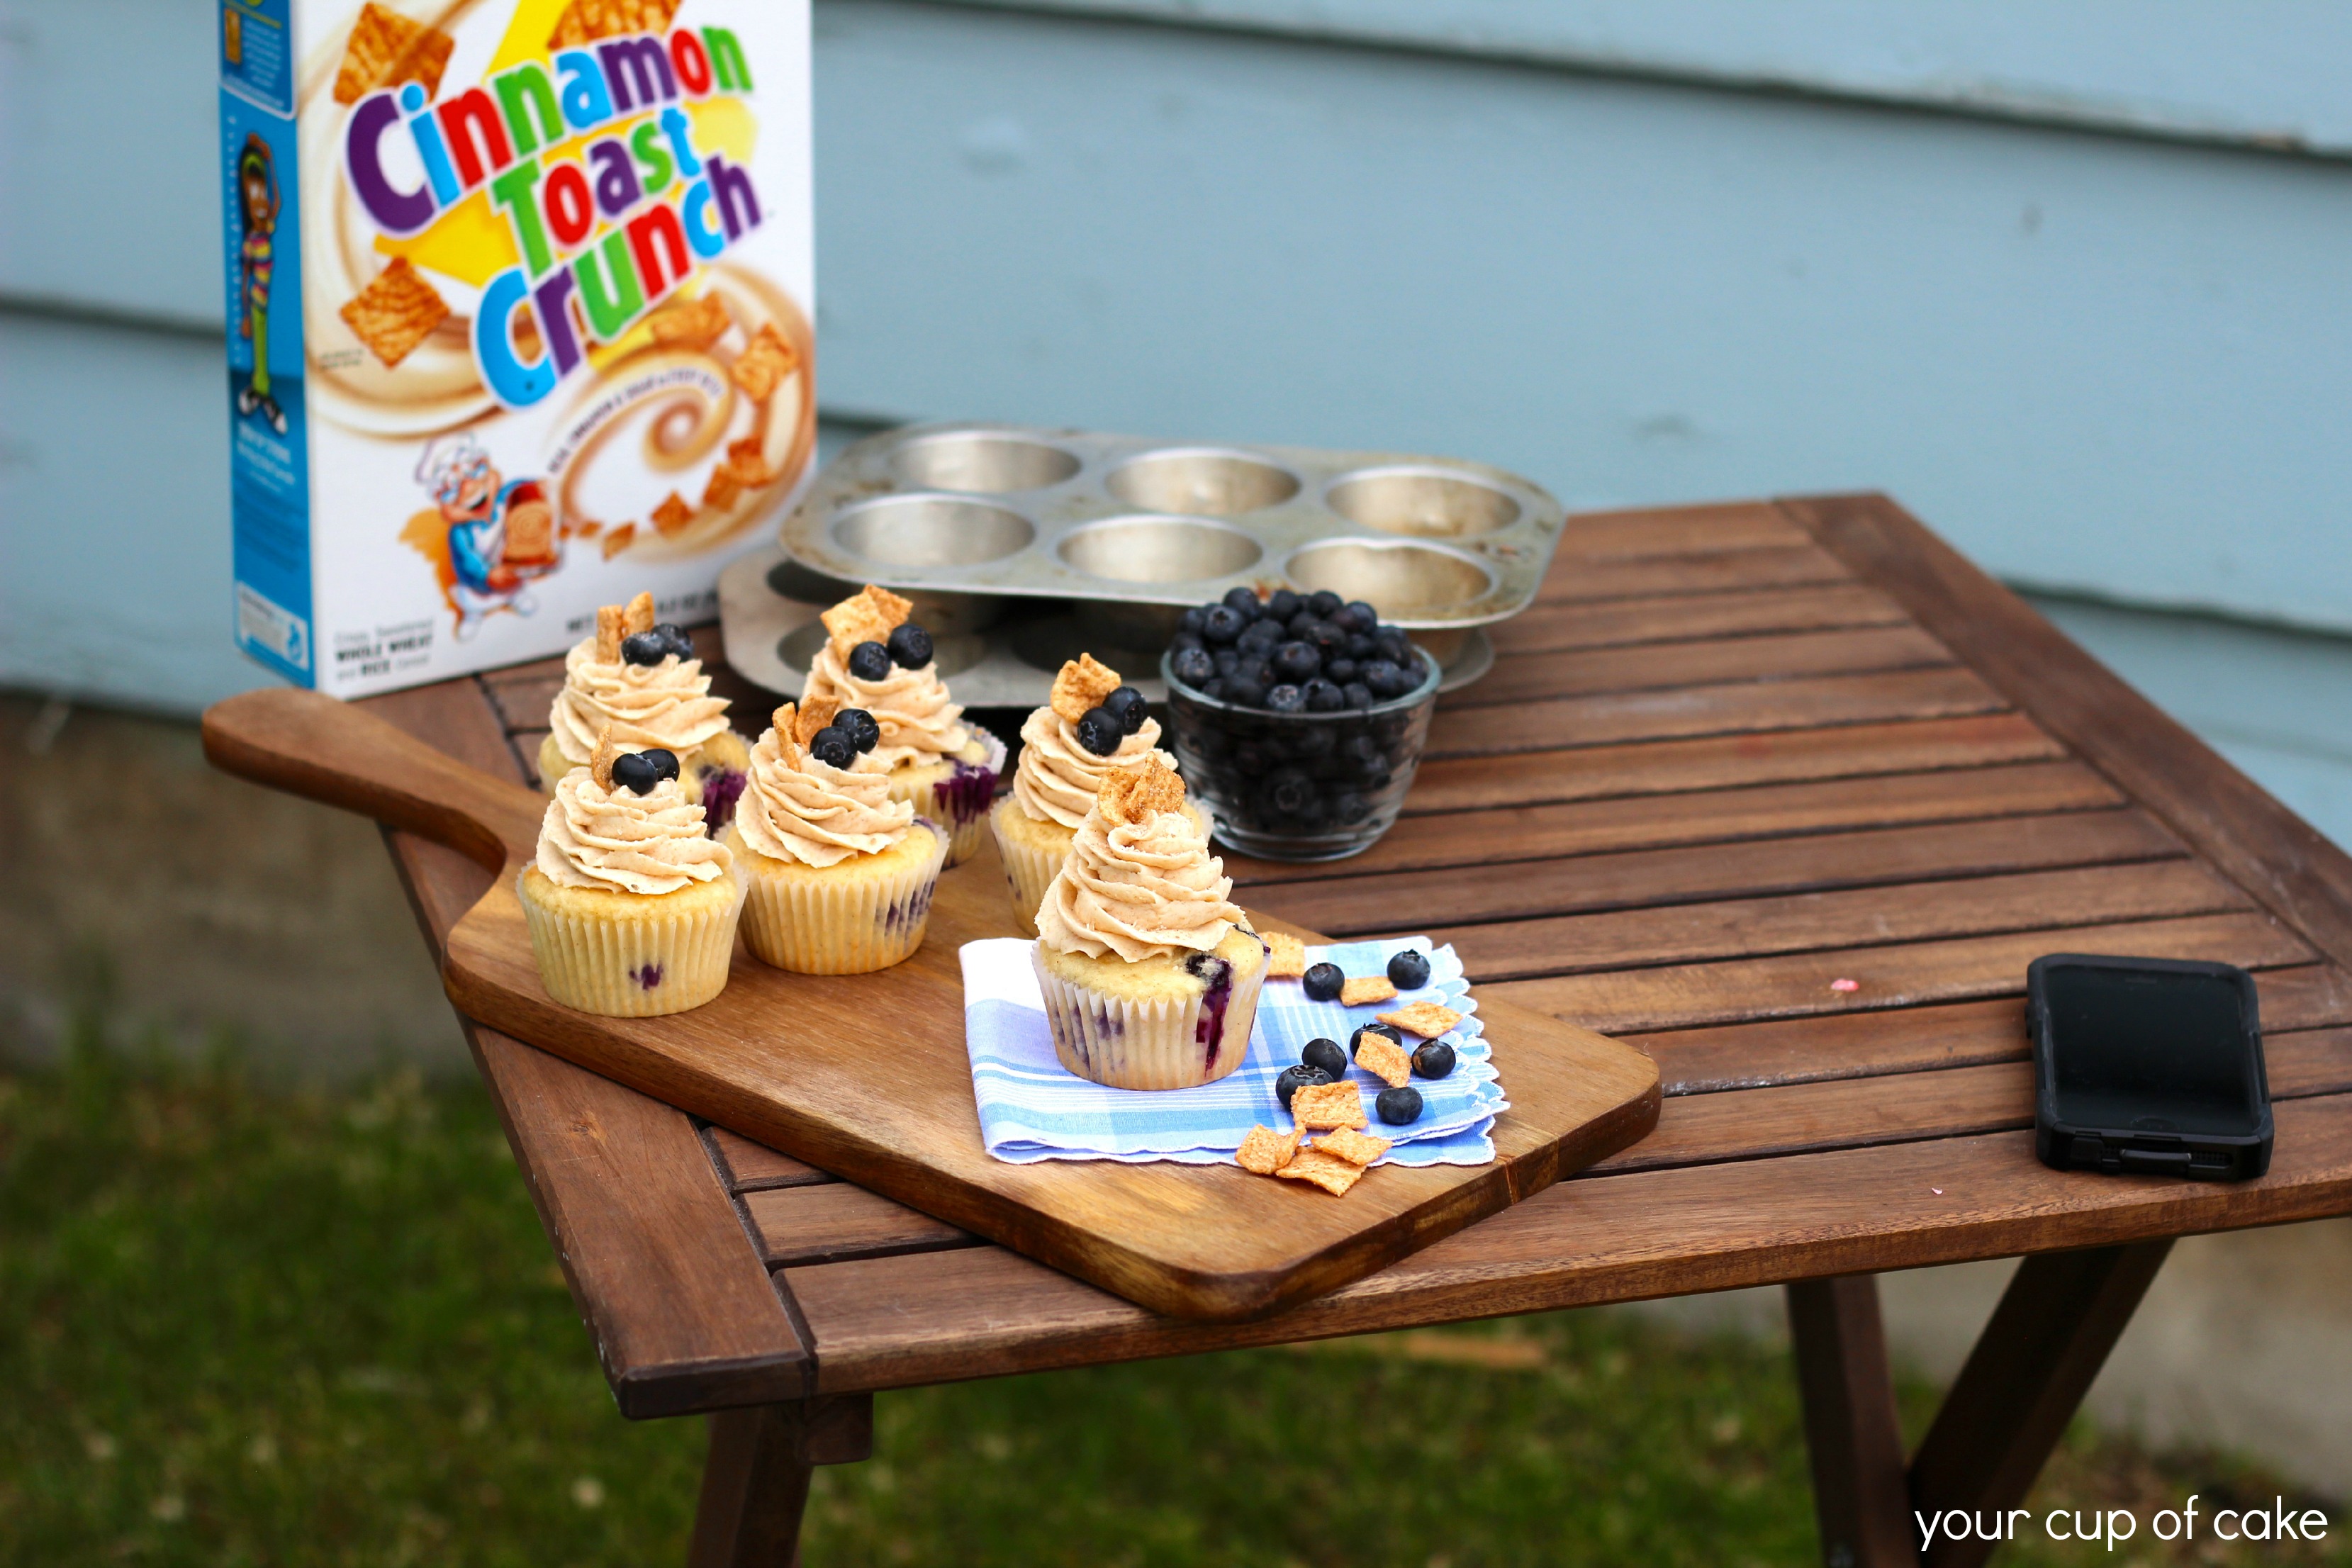
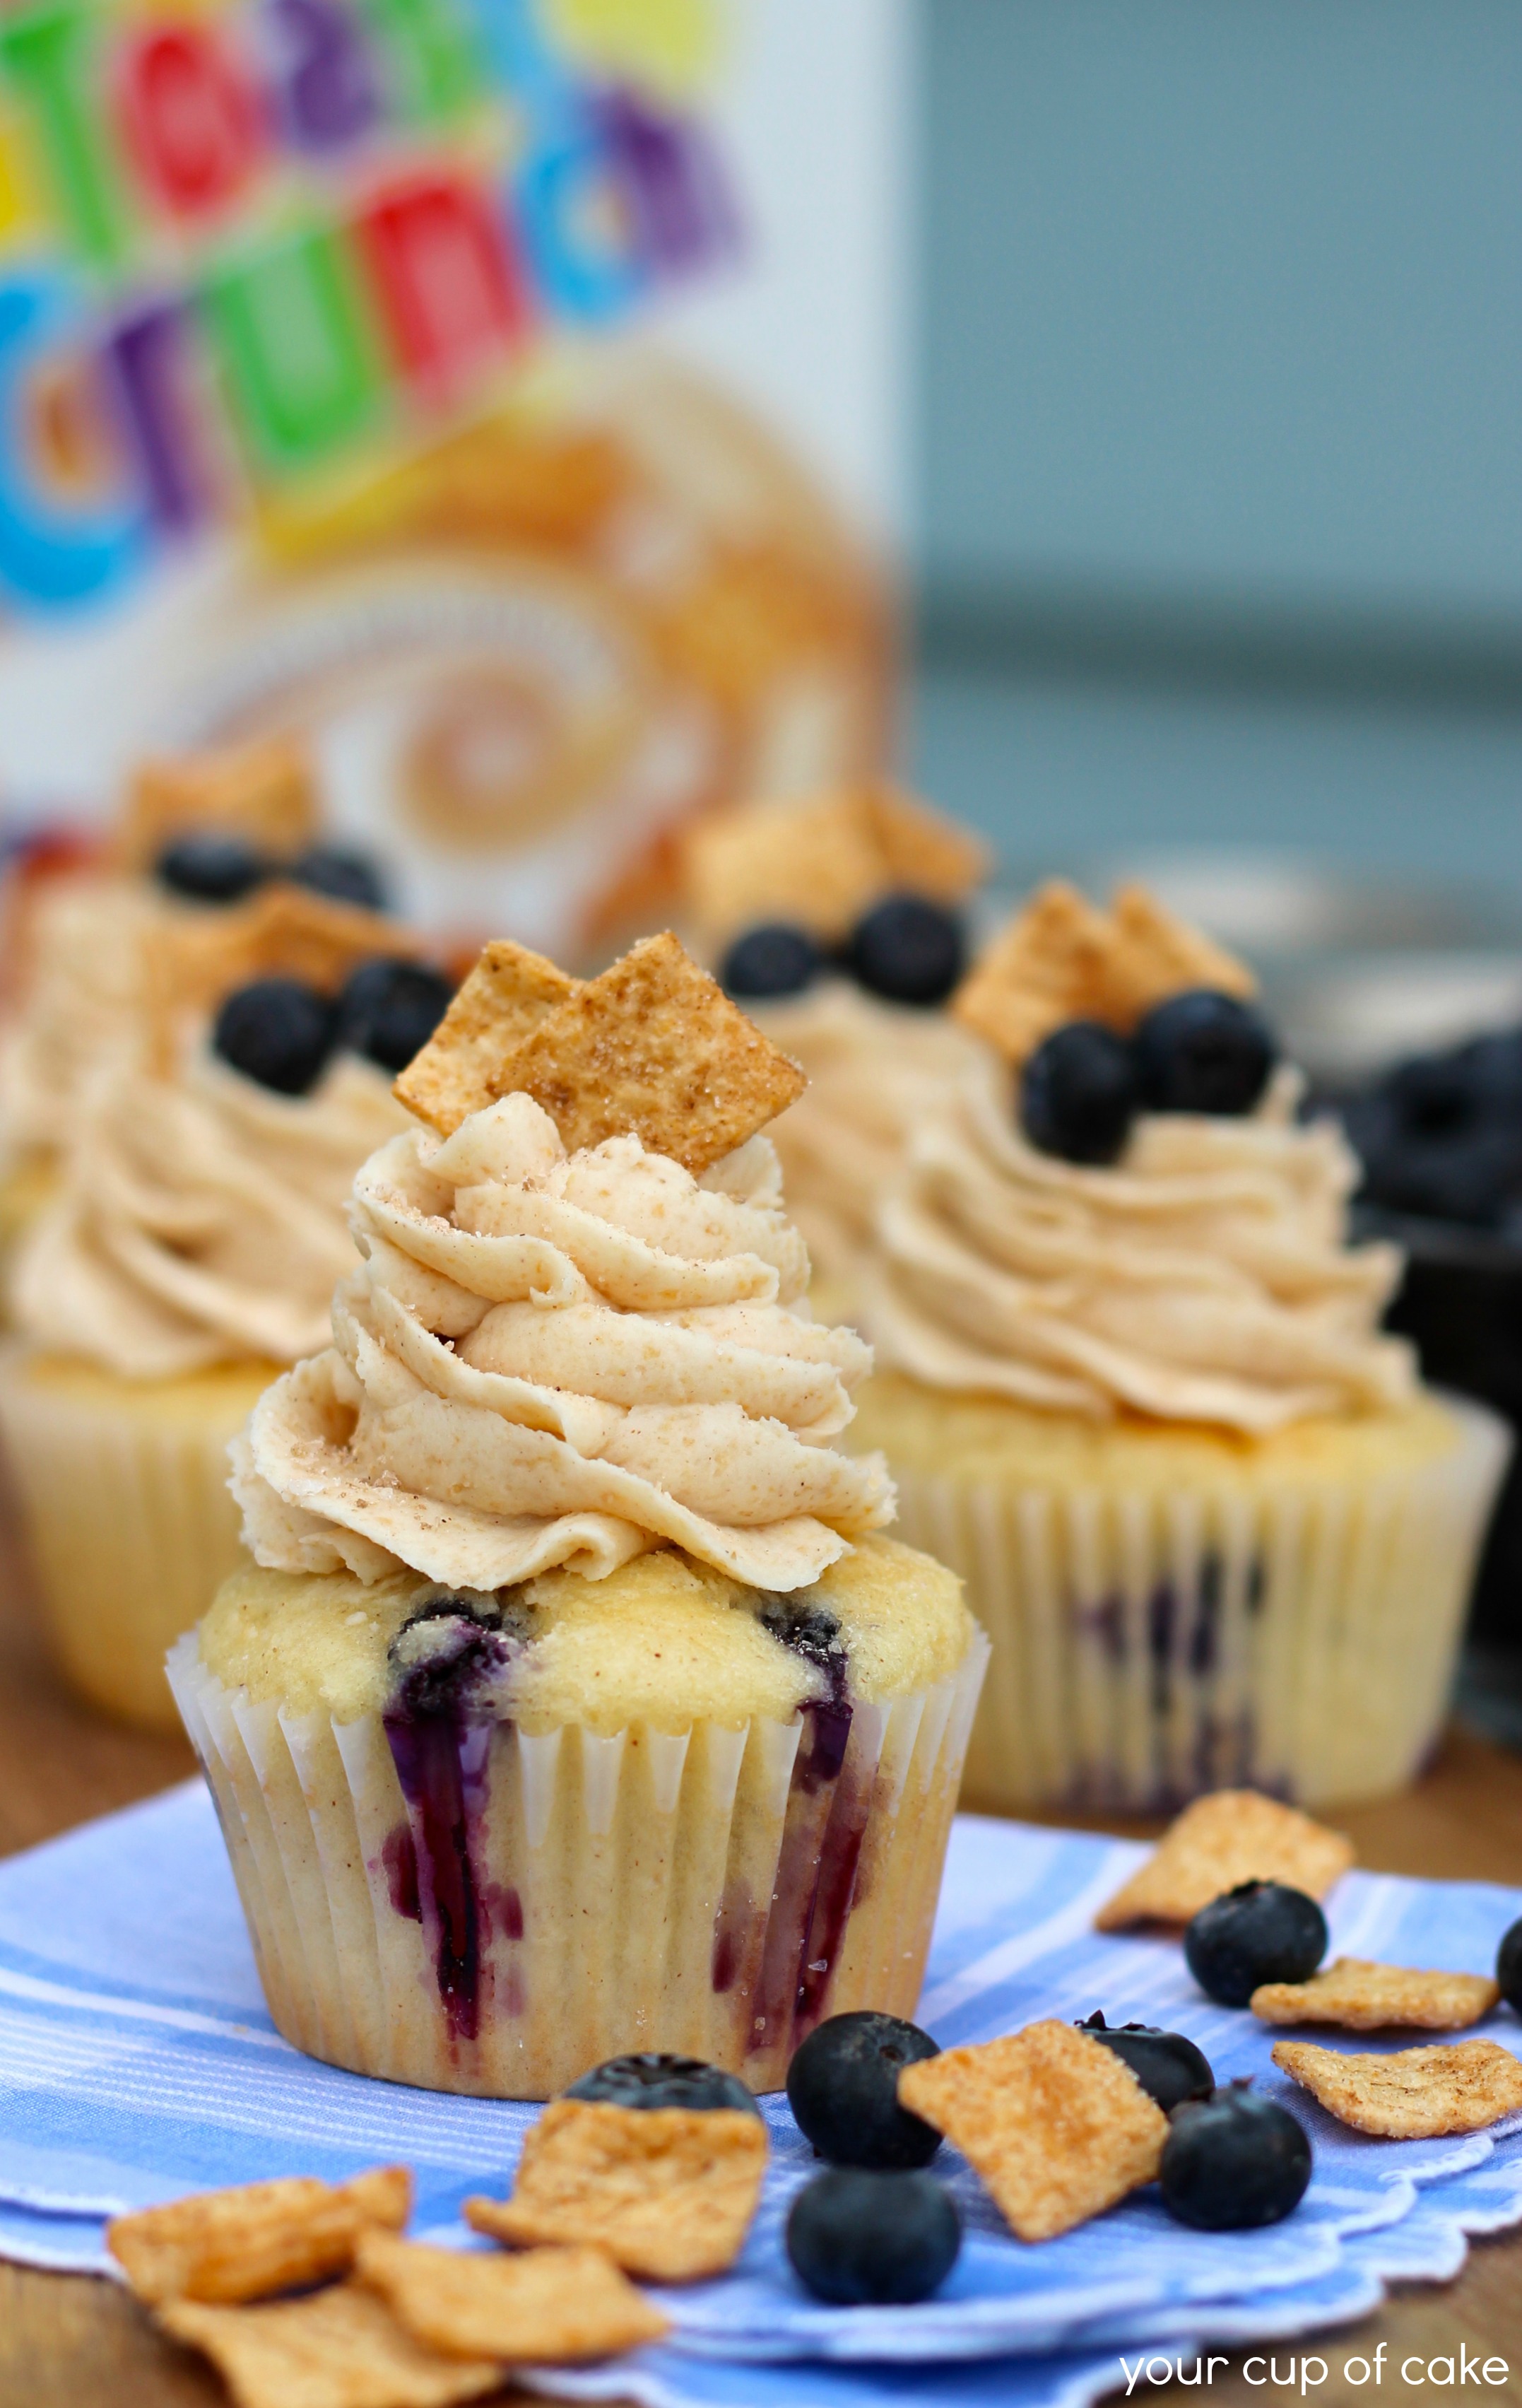
Here is my set-up from the recipe I posted yesterday, Blueberry Cinnamon Toast Crunch Cupcakes.
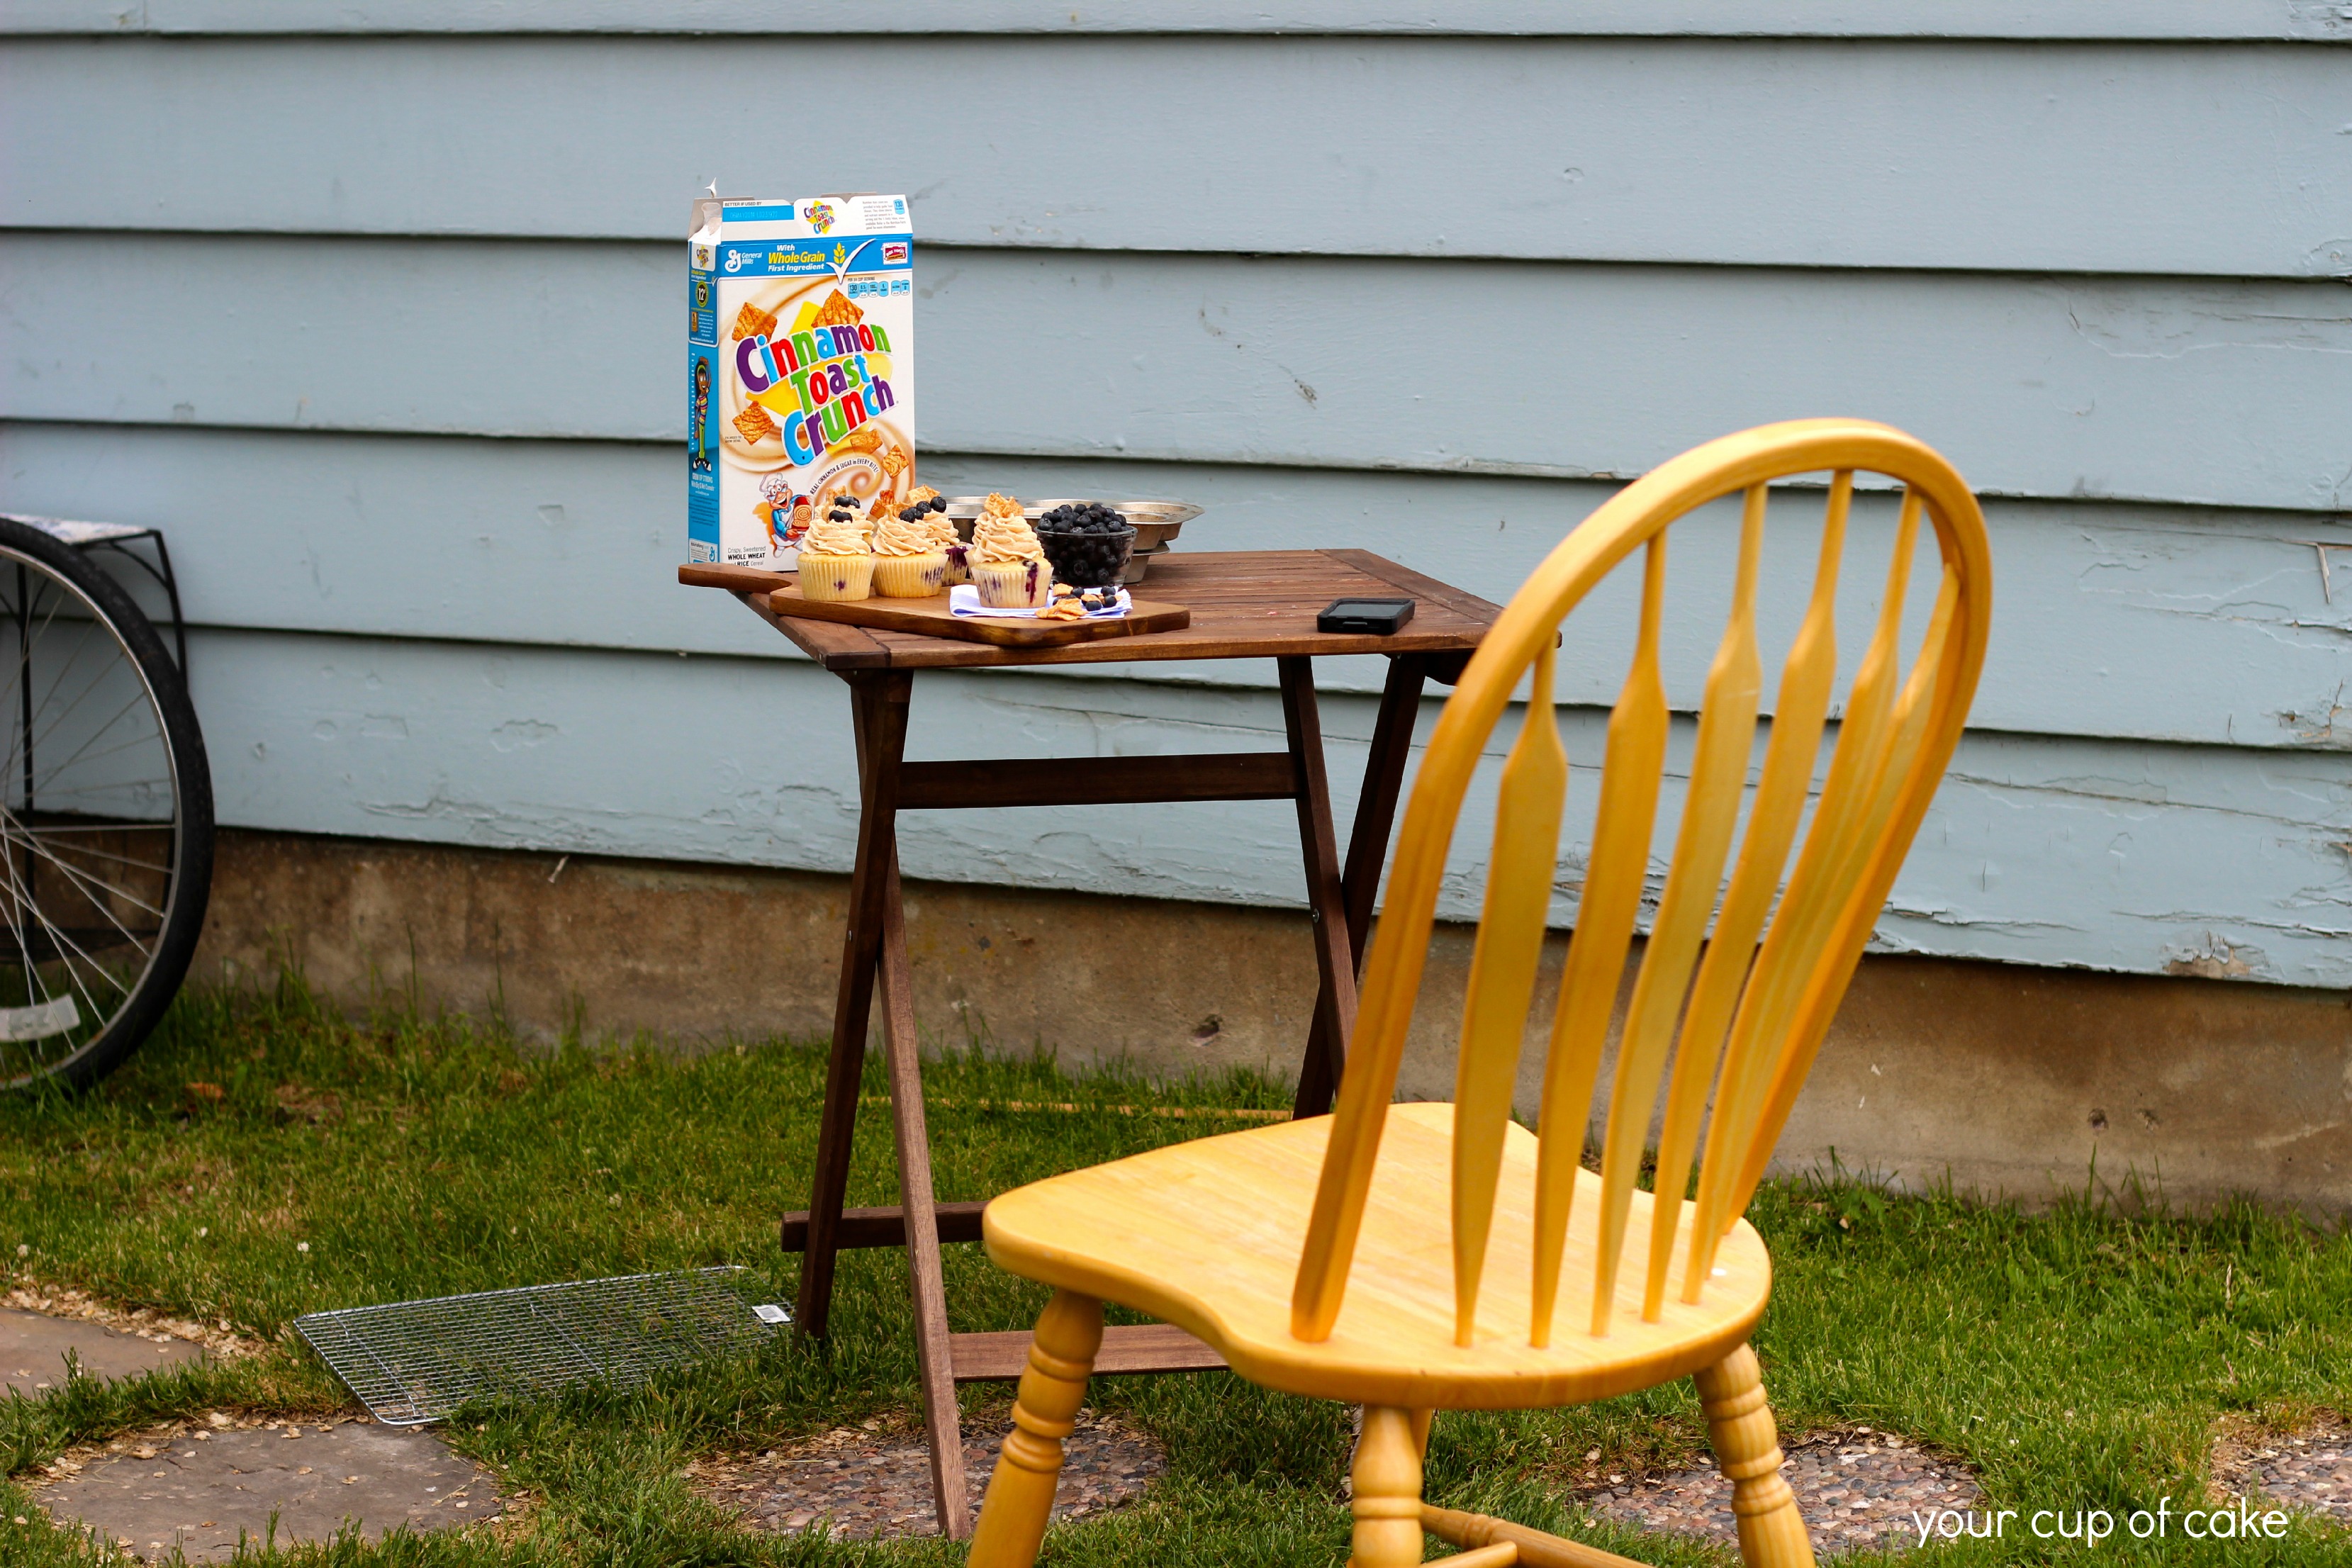
Notice what I have:
A table: From Ikea… it’s light and easy to move around and something to PUT my things on.
A chair: To sit in, or else I get really grumpy.
A cutting board: I didn’t want to texture of the table, I wanted the dark wood of the board to be my base.
A handkerchief: It adds a pop of color
Cereal and blueberries right by the front cupcake: It adds some flair and shows what the cake is all about. (And yes I hand picked each blueberry and cereal piece to get the perfect ones.)
Cupcakes: I always put the prettiest cupcake up front and push the “uglier” ones to the back.
A bowl of blueberries: This adds texture to the background
Cupcake tins: This also adds some color and texture to the background
Cereal box: Again, more color and texture to the back as well and get’s a bit of the brand name in there.
My phone: For instagram but more importantly is BLARES Pandora radio to keep the birds from attacking me.
Okay, so a LOT of stuff, but it all has a purpose for being there.
Common Questions:
Can you use too many props?
YES and YES. But if you push a lot of the props to the back… they blur-out and become part of the scenery and not props.
How do you know what props to use?
I like to ask myself this question, “What could reasonably be on my table while making these cupcakes?” I answer that question and then I have a list of prop ideas.
Well, what did you think? Good lesson, bad lesson? Good post, bad post?
Because if you liked it… I have more to come


I like it!
I always wondered how to go about “setting the scene”.
Great information!
LOVED it!! This is exactly the kind of stuff I need to learn. You’ve got the camera I’ve been eying for the last year and a half. But for now, I’m using my iPhone and it gets tricky 🙁
It’s always nice to see the pull backs isn’t it??!! I think we all have a similar set up & most people are shocked to see where the images are actually taken when the final image looks the way it does. 🙂 Beautiful work as always.
Thanks so much for posting this! I was wondering what camera you use and what settings do you switch to for these photos? Do you photograph indoors, or always outdoors (and how do those settings change?)
Love the post – would love to see more! 🙂
I found it very educational , step 1, check!
Onto lesson 2 please; )
Wonderful info,thank you so much!!!!! Now I just have to learn to decorate my cupcakes to look as good as yours,or even half as good.
Thanks so much for posting this. Now i’m craving these cupacekes.
I always use natural light, (there will be a post on lighting) and as for settings… all that really matters to me is that I get a shallow depth of field. Most “real” photographers all use Manual mode, but that scares me.
There are a bunch of tricks for covering up “mistakes” when piping.
Great lesson……can’t wait for more! Thank you!
Great post! I know my pics are more of the step-by-step process of how a recipe/craft/etc. is done, but I’d still like them to look nice. Right now I’m happy when the lens is not all steamed up from getting a “pot shot”. I’m always worried about getting the dishes in the sink in the photo, too (because when you cook, there are always dishes that end up in the sink). I haven’t figured out how to get the close up and blur the background. Looking forward to the next post!
Thanks For sharing this! I will practice this technique today, I can’t wait to receive more tips! regards from Mexico
Good tips on photography!
Ienjoyed this, please do more!
Great! Thanks for posting and please do post more photo lessons 🙂
Neat lesson, but the biggest disaster in any photography I might try would be the ugly cupcakes. I’m a million years from getting mine as cute as yours.
At least they taste good. 🙂
Great post! Loved it so please keep them coming 🙂
Good post! Next time it would also be helpful if you could let us know the settings you used on your camera (aperture mode, I’m assuming), but what F-stop,brightness, and setting. Thanks!
yes i like it a lot!! i take terrible pix of my cupcakes so this helped me sooo much! thank you! ps-how much did your actual camera cost?
Oh don’t you worry, I’m getting to that 🙂
I bought the BODY only which is around $600 (honestly go wit the T2i because it’s the same as the T3i except for the swivel screen) and my lens is $100
Thanks for the lesson! Some things to keep in mind. 🙂
Good lesson, thanks for the advice! So do you edit your photos at all or is it just point and shoot?
Great post Lizzy! I can’t wait to read more. Can you iphone blur out the background? I love that effect!
Awesome post Lizzy! I love natural light best when taking pics. Yours always look great! 🙂
Hi Anne, that “blurred” effect comes from the aperture setting… The lower the F-stop the blurrier the background will be. If you have a camera that allows you to change the aperture then you can play with it. 🙂
Excellent! I always need help with my pictures – which is why I haven’t been blogging lately. Now I have inspiration!
Oh, the information is coming! Got to keep people on their toes 🙂
There are APS for that!
Oh good! Never stop blogging!
Great post!! Great ideas 🙂
Thank you Lizzy,I get so excited every time I open a new email from you with new recipies and new ideas,you are just fantastic!!!!! Thank you for sharing all your wonderful ideas with us x x x
Thanks so much for sharing this information. You do such a great job with your photos and these are just the hints I need. Looking forward to the next lesson!
Brillant! Very usefull tips! btw, i love your cupcakes
Thanks for the tips. I’m looking forward to more!
Thank you! Looking forward to more lessons.
Wonderful! THANK YOU for this – it’s nice to have some simple pointers to start with and where to go 🙂 Thank you!
thanks for the fantastic tips
Thanks for sharing! I don’t have a blog, but am a home baker and amateur photographer. It is always fun to hear what others are doing, and what you are doing is beautiful AND delicious! 🙂 Keep up the great work!
Good tips … the photo for a recipe rally needs to give an idea of that’s in it, and what it is cooked in.
Are you working with Paint? In Mac it can be real pain in the ass. This is why I stopped using Mac computers and bought a standard PC, just becaue Paint is a built-in option there.
That’s an awesome recipe I tried and its amazing cupcakes.
Check out some details about the cheap and best clothes shopping in hyderabad where you can find food and other accessories best prices in cheap prices.
Staff Pro Tech is your recruiting partner to hire global tech talent at market competitive prices in 3 days with a free trial & half of budget from the market. Hire Top talent now
This article provides valuable insights into the topic at hand.Multynet’s best LED TV seems like a game-changer! The sleek design and advanced features make it a top choice for anyone looking to elevate their viewing experience.
Raeesa Premium Luxury Collection 2023 is simply breath-taking! The attention to detail and elegance in each piece is unmatched. A true embodiment of style and sophistication! 👌✨
Unique eventzz – India No. 1 Online Plattform to book Decoration services for All Occasions, Either It’s Birthday, Anniversary, Kids Party, Welcome Baby, Love Surprise, Terrace Decoration, or any House warming party. We at Unique eventzz always give the best decoration services to make every occasion so special and memorable for you.
Welcome to Horizon Belmond
At Horizon Belmond, we pride ourselves on offering a range of spacious and beautifully designed apartments that are tailored to suit your needs. Whether you’re in search of a 3bhk, 4bhk, 5bhk, or a penthouse, we have the perfect home for you. Each apartment is meticulously crafted to provide maximum comfort and convenience, ensuring that you feel right at home from the moment you step inside.
Amenities that Enhance Your Living Experience
When you choose to live at Horizon Belmond, you not only gain access to a beautiful home but also a wide range of amenities that are designed to enhance your living experience. Our commitment to providing a luxurious lifestyle is evident in the thoughtfully curated facilities we offer.
Our 2.75 acres of central greens provide a serene environment where you can relax and rejuvenate. Take a leisurely stroll or simply sit back and enjoy the tranquility of nature. For those seeking a more active lifestyle, our swimming pools offer the perfect opportunity to take a refreshing dip or engage in water-based activities.
I just wanted to thank you for this incredibly insightful blog.
This lesson is practical and clearly explained, especially the parts about lighting and composition which make it easy to follow. Placing cupcakes near a north-facing window and using a white card as a reflector really helps soften shadows, and you can get nice texture by shooting in RAW and adjusting exposure. Try varying aperture and switching between eye-level and flat-lay shots to see which best showcases the frosting details.
Loved this photography lesson!
The “setting the scene” breakdown is super practical and easy to follow, especially for beginner food bloggers. Small prop details really do make a big difference. Excited for the next lesson!
Wow, I love how detailed your setup is. I never realized how much thought goes into the background and little props for food photography. I especially love the idea of hand-picking blueberries and cereal pieces it really shows in the photos. Definitely giving me inspiration for my next cupcake shoot