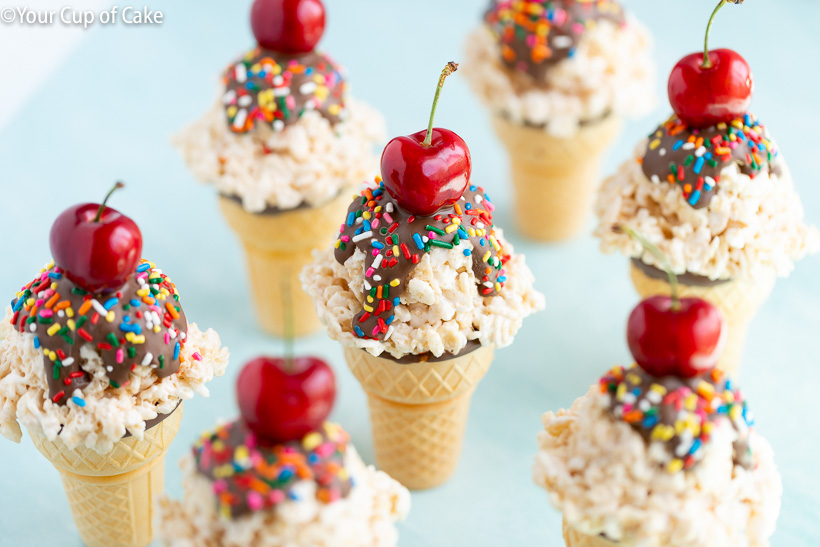
The CUTEST treat ever! These Rice Krispie Treat Ice Cream Cones will be the hit of the summer and you can make them in 10 minutes!
Rice Krispies that look like Ice Cream
I taught my Sunday school class last week and had it themed to the idea of an Ice Cream Sunday Sundae. I wanted to bring in a treat but I knew ice cream was off the table. So, I needed the treat to look like ice cream. Well, Rice Krispie Treats came to the rescue! I didn’t really know how I would make it happy but they came together SO easily and I was shocked by how cute they were. My little 6 & 7 year old Sunday School class gasped when they saw them!
Krispie Cones
I really love coming up with adorable treats that anyone can make. No fancy tools or fancy ingredients or high skill level. This would be a perfect activity to even make with your kids!
Rice Krispie Treat Ice Cream Cones
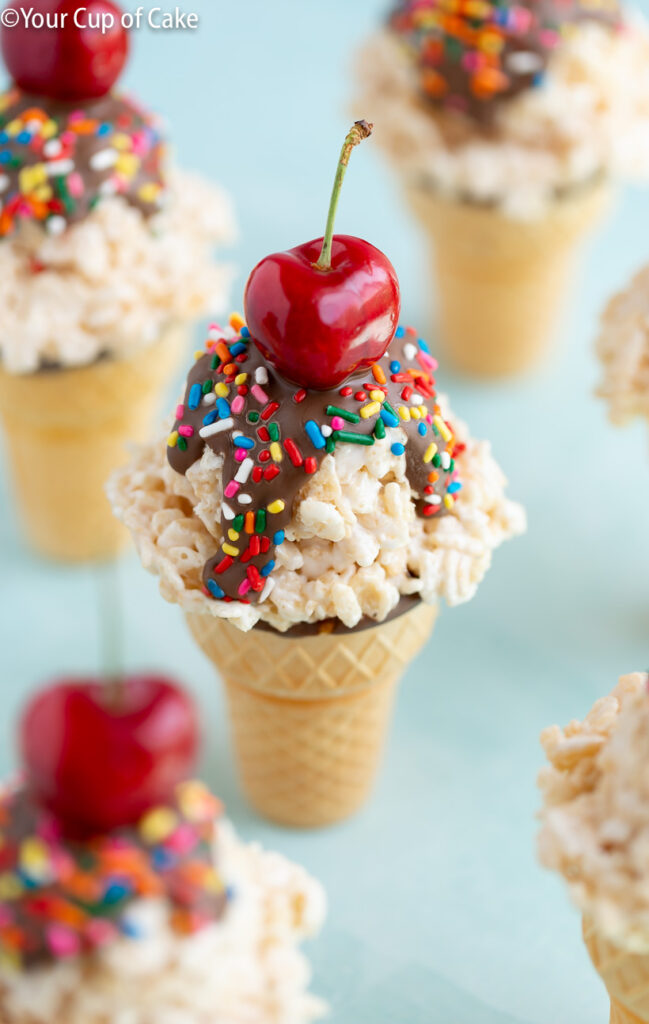
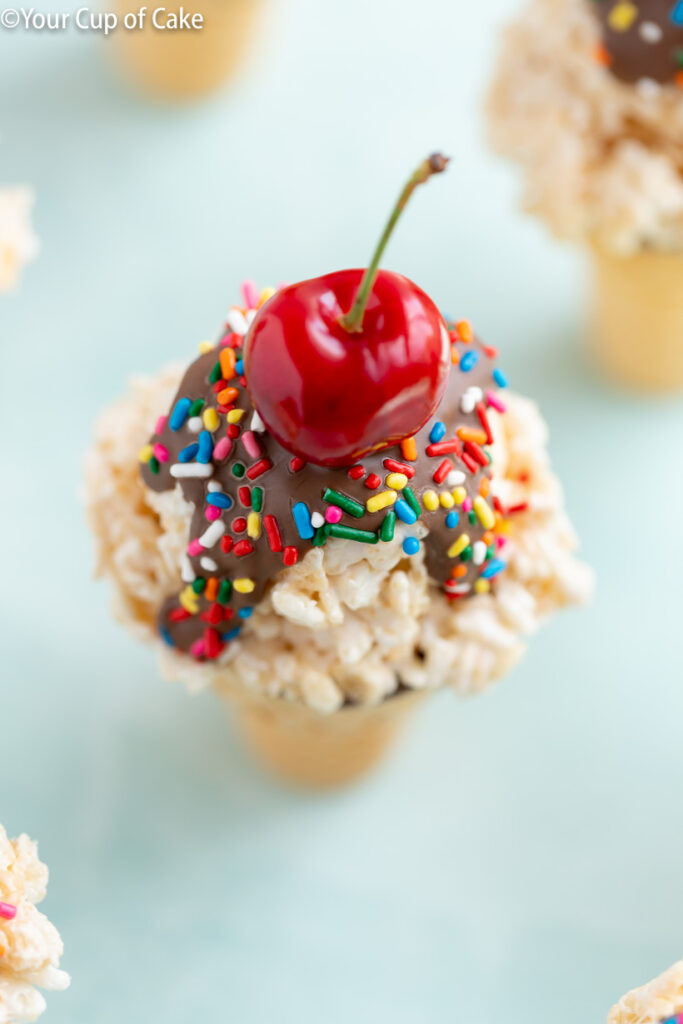
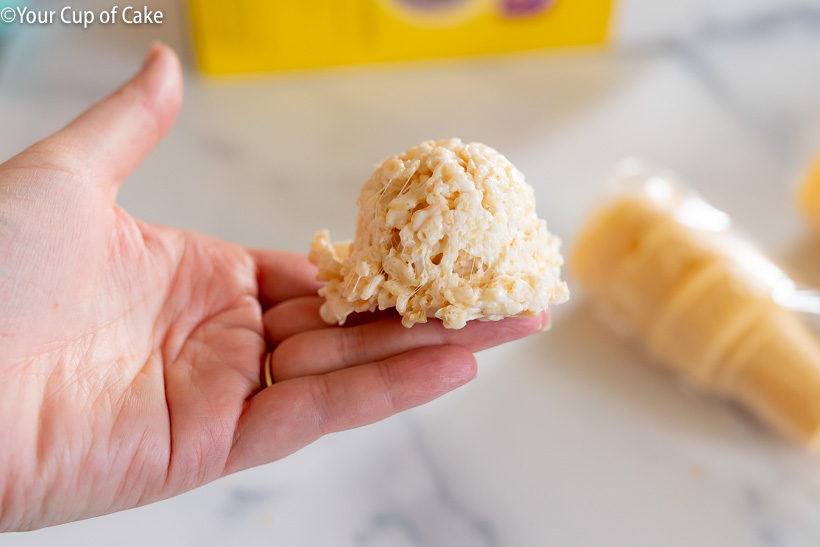
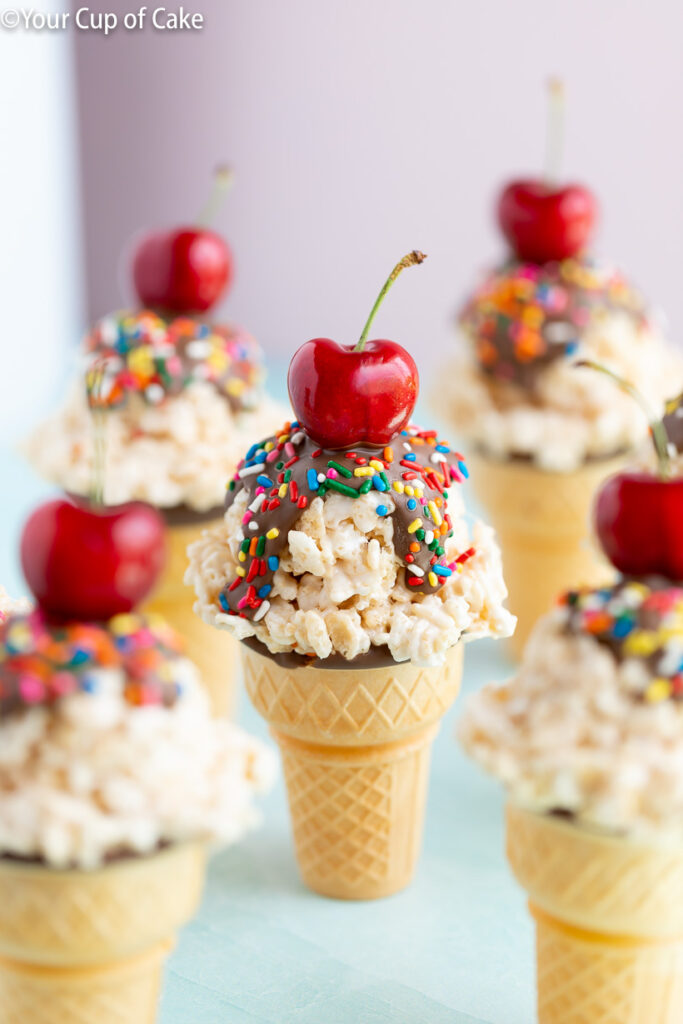
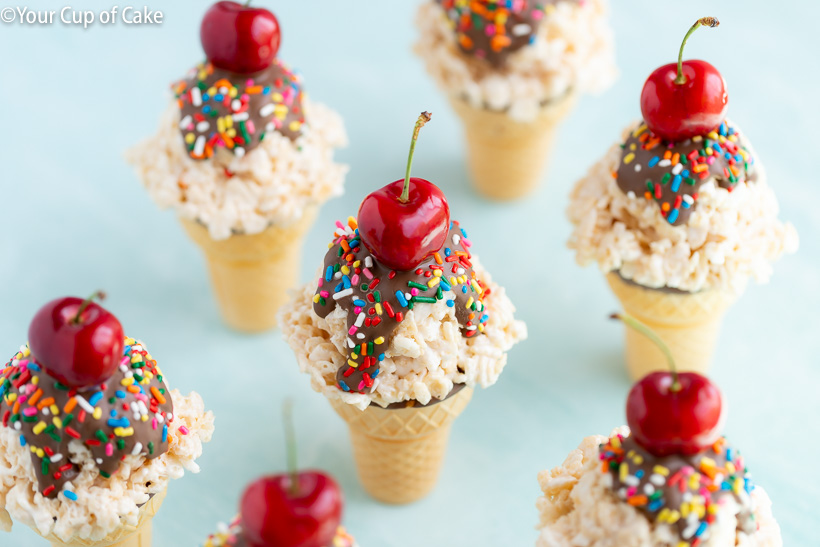
These are so easy to make! Make your favorite batch of rice krispies (everyone likes a different marshmallow to Krispies ratio) and then while the batch is still warm use a ice cream scoop (this is my favorite one I’ve used it for 12 years and it’s never broken) to scoop out your “scoops” of ice cream. Use some melted chocolate to “glue” on the scoop, add a drizzle of chocolate and some sprinkles to make it even more darling. And then add a cherry on top if you really want to make it a show-stopper treat! Now, I didn’t fill my cones with anything but you could stuff it full of more krispies, fill it with just marshmallows, M&M’s, a secret message from Mom, anything! I will say these treats are top heavy so filling the cones with a candy isn’t the worst idea. You could even add sprinkles or a cup chocolate chips to the rice krispie batter to look like a particular ice cream flavor!

Dip tops of the cones into the melted chocolate and don’t be stingy because this is the “glue” to keep the cone and rice krispie treat mixture together!
You can use any cone shape to make these! I just liked these ones because they had flat bottoms and could stand up on their own. But if you have other ice cream cone shapes in your pantry already, use those! even the big waffle cones would be fun! You can also use mini M&M candy to substitute sprinkles on top!

Tips for making these cute treats
First of all, the cherries. They are totally optional, I didn’t even use them the first time I made these and they were still adorable. If you do use the cherries, remember they have pits inside so remind kids of this too. Also, they are the one thing that can fall off more easily. So maybe half dip the cherry in melted chocolate and then add it on top to better “glue” it to the top. I HIGHLY suggest using candy melts and not just chocolate chips and coconut oil because the melts will dry harder and faster. You can buy them at Michaels, Hobby Lobby, WinCo (bulk bins) and even more grocery stores sell the Ghirardelli brand!
Rice Krispies made in the Microwave
I have always made my rice krispie treats in the microwave. It wasn’t until college that I realized most people make them on the stove on low heat in a large saucepan. I just put my regular marshmallows (miniature marshmallows) and butter (and vanilla and salt) in a microwaveable bowl and zap it for a 50 seconds to melt. Stir the mixture, add crisp rice cereal, stir again and then I’m done! It’s so fast! Plus, I hate the idea of having to wash such a huge pot when you do it on the stove! The plastic Microwave safe bowl is a cinch to clean. Another big debate is how many tablespoon butter do you add? My husband is always trying to convince me to double the amount I normally put in haha!

Let’s mention one more this or that debate… what do you call the cereal? Krispie Cereal? Crisp Rice Cereal? Cups Rice krispies cereal?

Rice Krispie Treat Ice Cream Cones
These Krispie Cones are the cutest thing you'll make all summer! And you csn make them in 10 minutes!
Ingredients
- 1 batch Rice Kripies Treats
- 15-25 ice cream cones
- 1 cup candy melts melted
- 1/2 cup sprinkles
- 15-25 cherries optional
Instructions
-
Mix up your favorite batch of rice krispie treats! While they are still warm, use a greased ice cream scoop to scoop out portions. You don't want the scoops to be perfect around the edges, this will help it look more realistic. Pop out the "scoops" onto parchment paper or wax paper to cool.
-
After the scoops have cooled, melt your candy melts in a bowl or pyrex measuring cup and dip the tops of the cones into it. Place a "scoop" of krispies on top and gently press down to attach it. Let cool for a minute or two.
-
Spoon over extra melted chocolate, add sprinkles and a cherry on top! Let cool before transporting. The melts will dry in a couple minutes and then they will be solid and won't fall apart!
Recipe Notes
See my notes written in the blog post for further information.
The cherries are truly optional and are the most fragile part of the treat. Think about half dipping them in chocolate before adding them to the cone to provide extra “glue” to get them to stay on. Also, if feeding to children remember the cherries have pits!
Store in an airtight container until ready to serve