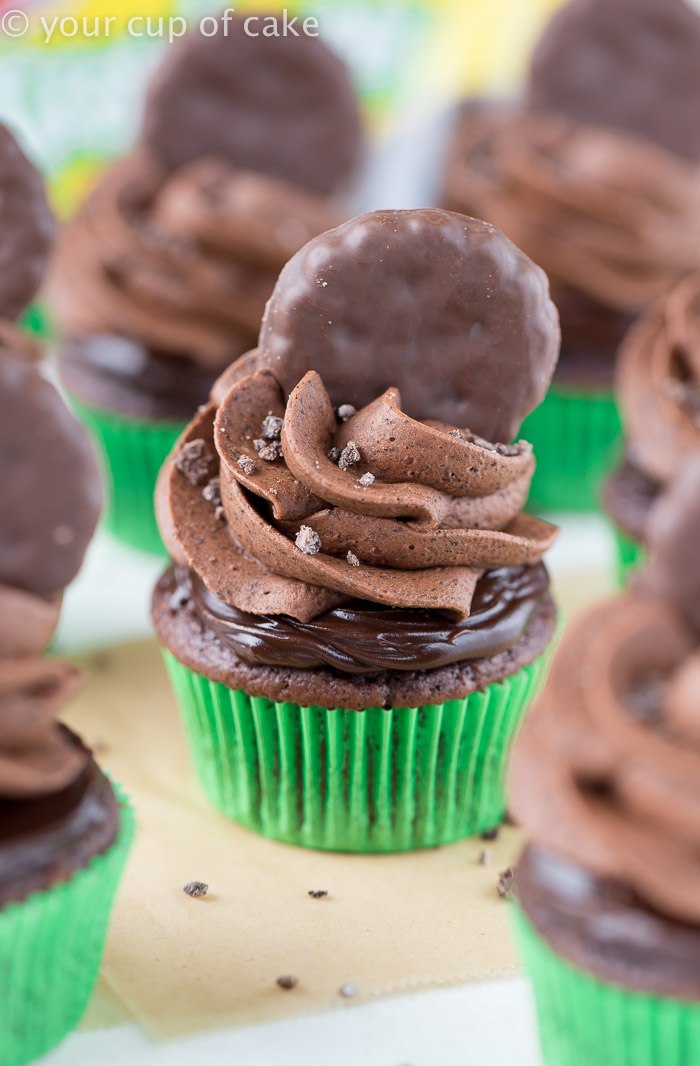
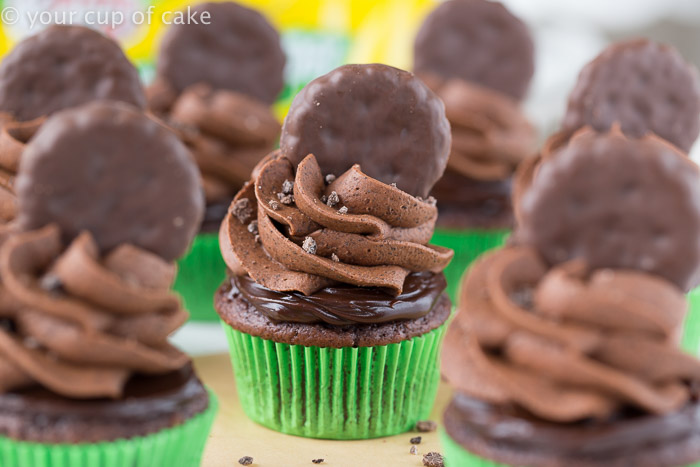
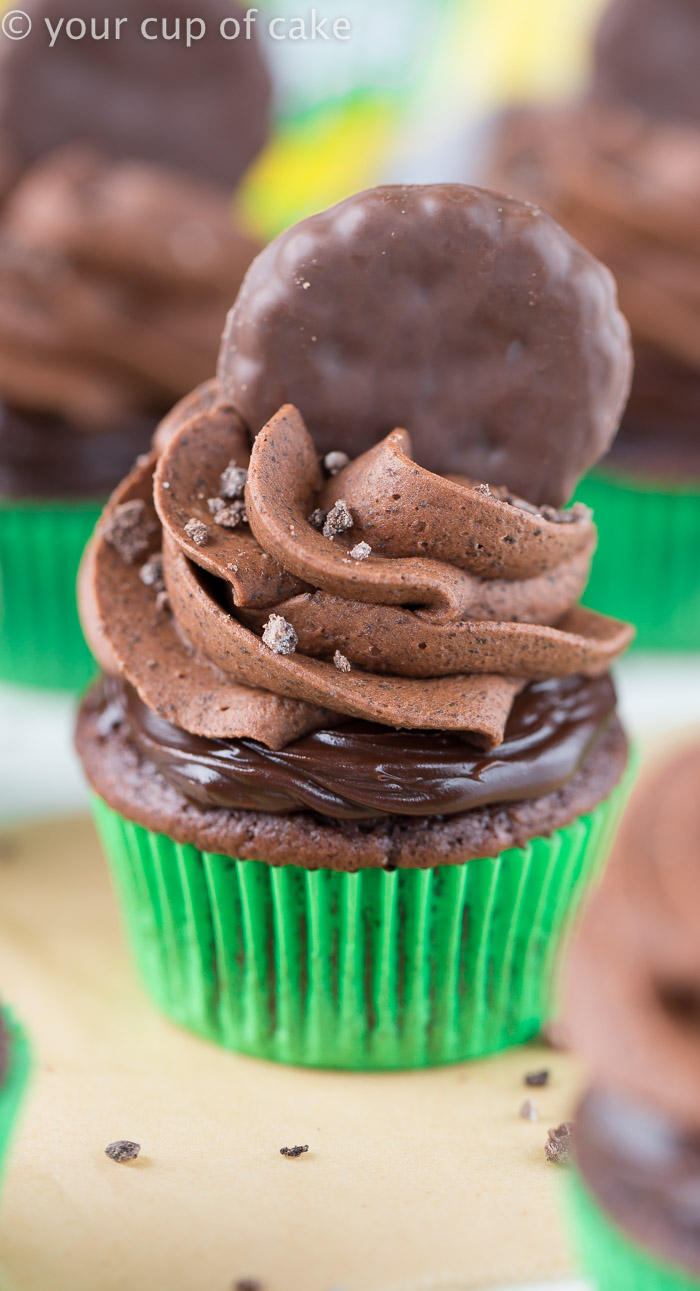
Thin Mint Fudge Cupcakes with chocolate minty cookie frosting and a layer of hot fudge sauce, yum! These are a dream come true! My friend ate one last night and she said “This was the best thing I’ve ever had.”
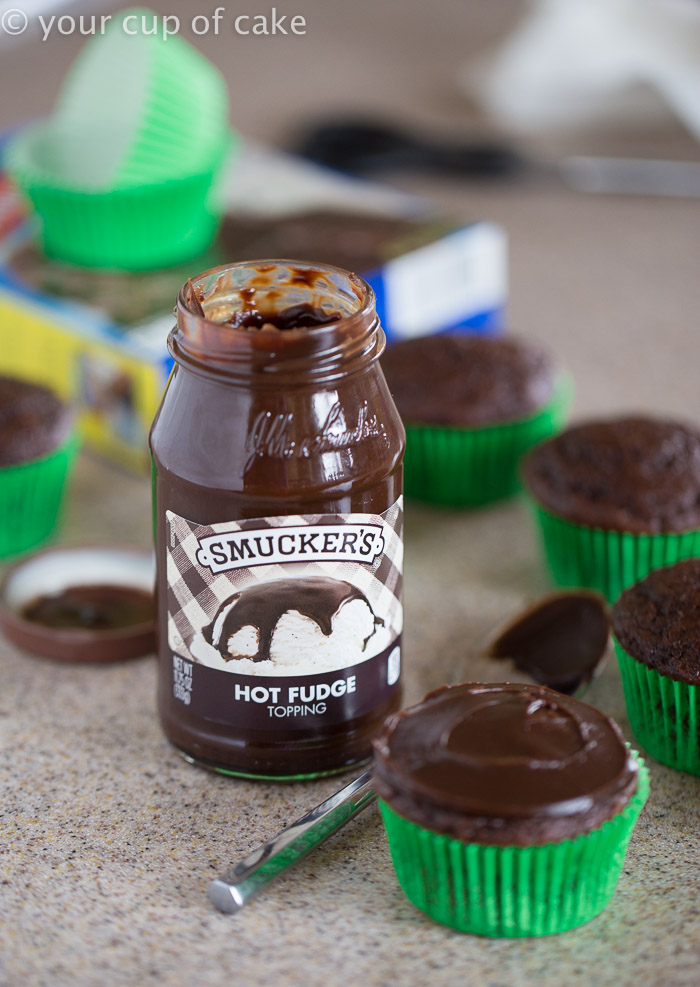
So I love using a layer of ganache between my frosting and cupcake because it really makes the cupcake taste more decadent and special. But this time I used hot fudge sauce! I had fudge on the brain because I used it in my Thin Mint Poke Cake recipe last week and then I ate it while I watched some Netflix (eeeeek! Terrible I know! But oh so good.). And I needed to find a way to use it in my baking so that I wouldn’t eat the whole jar!!! Well, I did finish eating the jar by the spoonful… but I got another jar and topped off these cupcakes!
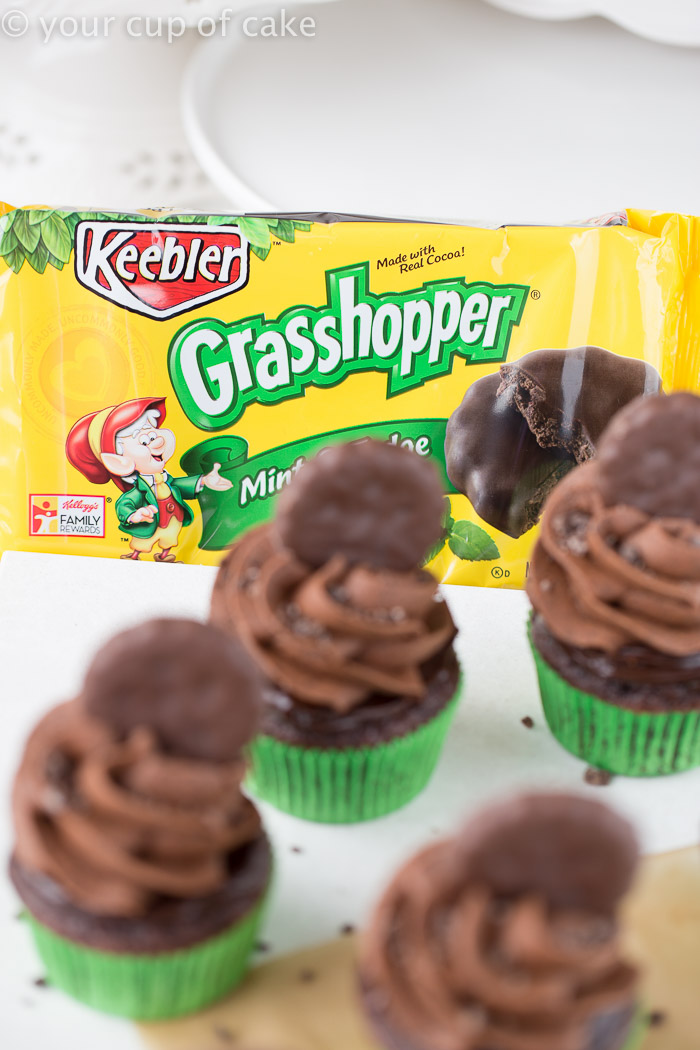
And I don’t have any Girl Scouts in the area so I cheated and bought the Keebler Grasshopper brand but they’re still incredible!
Since I only used the really fine cookie crumbs for the frosting, I used the larger pieces as “sprinkles” after I piped out the frosting. No crumb left behind 🙂
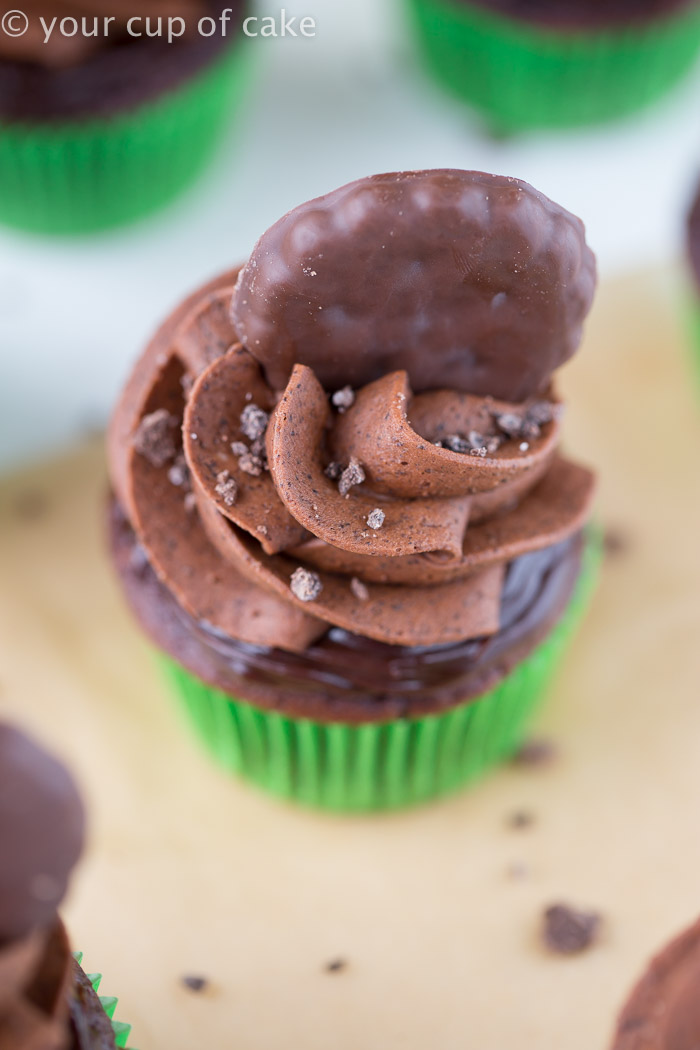
Just look at that layer of hot fudge sauce… it’ calling your name!
I try to make everyone happy here, so the recipe below is a scratch recipe but if you want a cake mix recipe: 1 box Devil’s Food Cake mix, 3 eggs, 1/2 C. oil, 1 C. milk, 1/2 C. sour cream, 2 tsp. vanilla extract bake for 15-20 minutes at 350 degrees.

Thin Mint Fudge Cupcakes
Ingredients
- CHOCOLATE CAKE: for cake mix recipe see above
- 1 1/2 C. all-purpose flour
- 1 C. unsweetened cocoa powder
- 1 tsp. baking soda
- 1 1/2 tsp. baking powder
- 1/2 tsp. salt
- 4 eggs at room temp
- 1 C. sugar
- 1 C. brown sugar packed
- 2/3 cup oil
- 1 C. buttermilk or milk
- 1 Tbsp. vanilla extract
- JAR OF HOT FUDGE SAUCE
- THIN MINT FROSTING:
- 12 Thin Mints finely crushed
- 3/4 C. butter
- 1/3 C. unsweetened cocoa powder
- 2-3 C. powdered sugar
- 1 tsp. vanilla extract
- 1/2 tsp. peppermint extract
- 1-2 Tbsp. milk
Instructions
-
1. Preheat oven to 350 degrees and line pans with cupcake liners, I used green liners because I wanted them to look even more minty!
-
2. In a medium bowl, combine cocoa flour, cocoa powder, baking soda, baking powder and salt. Set aside.
-
3. In a large bowl, combine eggs, sugar, brown sugar, oil, buttermilk and vanilla extract.
-
4. Pour half the dry ingredients into the wet and stir. Then add the rest of the dry ingredients and stir again. Don't over mix.
-
5. Fill cupcake liners 2/3 full and bake for 18-22 minutes or until an inserted knife comes out clean. Let cool.
-
6. Spread a layer of the hot fudge sauce onto each cupcake. You can heat up the fudge in the microwave to make it more spreadable, but I wanted mine to have a thick layer so I didn't heat it up.
-
7. Thin Mint Frosting: Finely crush your cookies (I used my blendtec) and if you want to use a piping bag you'll need to only use the really fine cookie crumbs, so use a sifter to remove the larger pieces. Beat the butter, cocoa powder, 1 cup powdered sugar, vanilla, peppermint and 1 Tbsp. milk. Continue to add more powdered sugar and milk until you reach your desired consistency, and then stir in the crushed Thin Mints!
-
8. Pipe over the fudge layer on the cupcakes and top with cookie pieces and extra Thin Mints!


Please I have seen all of the wonderful cupcake bit nobody seems to put what tip number they use as a beginner i am having a hard time just by seeing the pictures. Help us poor beginners out just a bit Thanks
If I make these the night before we eat them will the fudge sauce still be the right consistency or will it dry out?
it’s first time I’m seeing a green colour cup cake
The food looks so delicious and so wonderful, I really want to enjoy such delicious food. Thank you for sharing the recipe.
Too many interesting things here, thanks for these great recipes. Love your page and I will save it to read the next information you update.
From where do you come up with these ideas? You can make everything. There’s magic in your hands. 🙂
Appreciate you posting this – really helpful
Wow, amazing post, wait for your next post, thanks for sharing keep it up
Absolutely loved this—thanks for sharing it!